Trigger deployment
Same often deploys automatically when a task seems complete. You can also directly tell Same to deploy at any point:If the deployment attempt failed, just tell Same to debug and retry:
md My deployment failed, debug and retry Deployment URLs
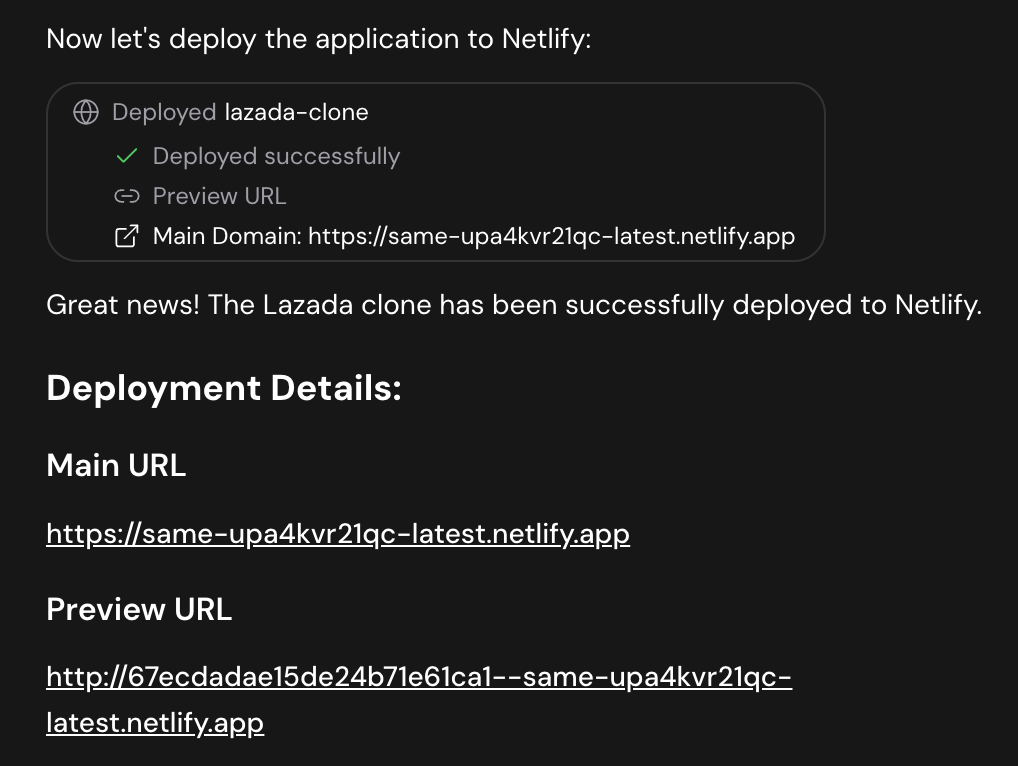
After deployment, you’ll get:- Preview Domain: A unique URL for that specific deployment. Good for testing.
- Main Domain: The primary project URL that stays updated with your latest deployed version.
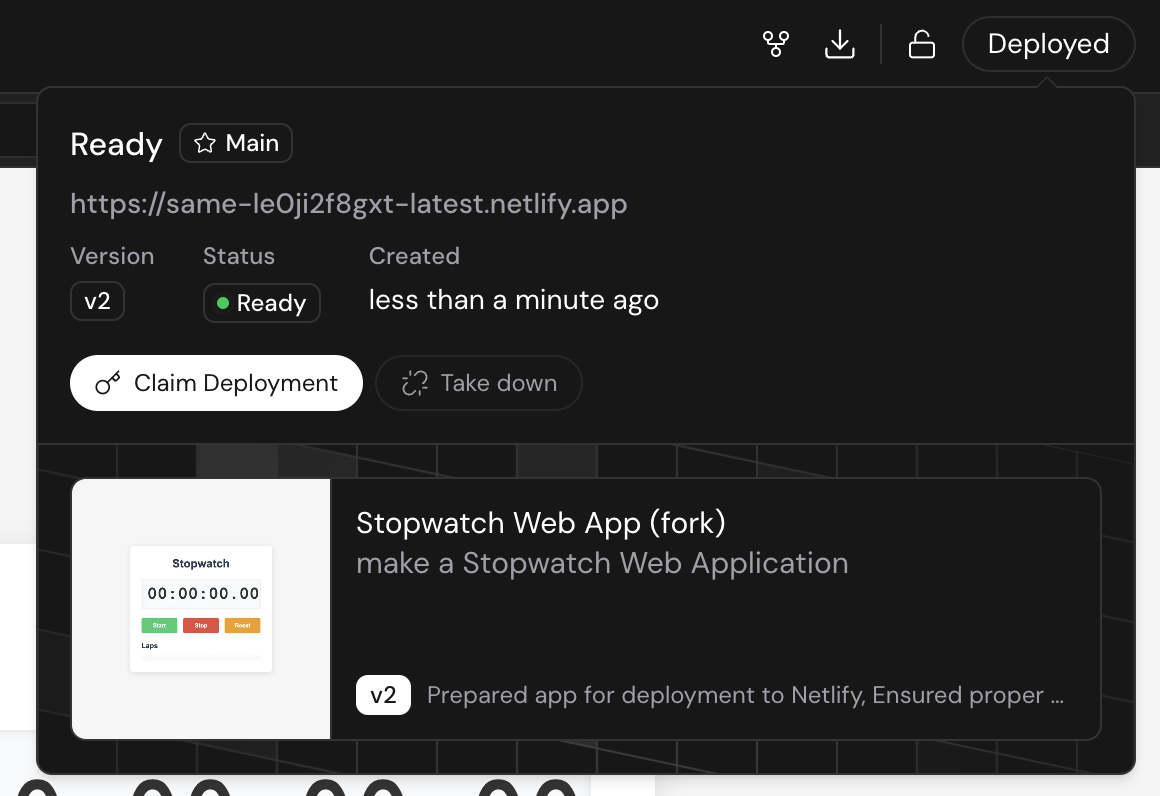
Claim deployment
You can claim deployment in Netlify to transfer the site to your own account and setup domains. To claim the deployment- Click Deployed button
- Click Claim Deployment
- You will be redirected to Netlify, follow the instructions to claim
Domain customization is not yet available within Same. Claim your project via
Netlify and follow their domain setup instructions.
Manage deployment
You can take down the deployment to unpublish your project. A project taken down can be redeployed, and the main domain stays the same. To take down deployment- Click Deployed button
- Click Take down
- Click Deploy button
- Click Redeploy
Troubleshooting deployment issues
If your deployment fails with an error message, there are several common causes and solutions to try. To troubleshoot this error, check the following:-
Have you claimed the deployment for this project?
When you claim a deployment, all future deployments for that project will use your own Netlify account and credits. Check if you’ve claimed this project’s deployment:
- Click Deployed button to see deployment status
- If it shows as claimed, you’re using your own Netlify resources
-
Have you run out of free credits in your Netlify account?
If you’ve claimed this project’s deployment, check your Netlify account to see if you’ve exhausted your build minutes. Claimed deployments use your own Netlify resources, which have limits on free plans.
Unclaimed deployments use Same’s Netlify resources and are free to you. If your deployment isn’t claimed, credit issues are unlikely the cause.
-
Solutions to resolve credit issues:
If you’ve claimed the deployment and run out of Netlify credits, you have two options:
- Top up your Netlify credits: Log into your Netlify account and add more build minutes to your plan
- Remix your project on Same: Create a fresh copy of your project with a new, unclaimed deployment that uses Same’s resources
FAQ
Why should I deploy?
Why should I deploy?
Deploying your project has several benefits:
- Share with Others: Make your project accessible to anyone through a public URL
- Test in Production: Verify your project works in a real environment
- Version Control: Each deployment creates a snapshot you can return to
- Professional Presentation: Show your work to clients or employers with a live site
Can I deploy my site elsewhere?
Can I deploy my site elsewhere?
Currently, Same doesn’t support deploying to other platforms natively. However, you have two options:
- Download your project:
- Download the code and deploy it manually to your preferred platform
- Follow the platform-specific deployment instructions
Project download is a premium feature only available on paid plans.
- Link with GitHub:
- Push your code to GitHub
- Deploy from your GitHub repository using any hosting service
- Maintain full control over your deployment process
How to customize the domain of my deployed project?
How to customize the domain of my deployed project?
Currently, Same doesn’t support custom domains natively. To use a custom domain:
-
Claim your project on Netlify:
- Deploy your project first through Same
- Follow the claiming process on Netlify
-
Set up custom domain:
- Go to your site settings in Netlify
- Follow Netlify’s domain configuration process
Why should I claim my project?
Why should I claim my project?
Claiming your project on Netlify provides several key benefits:
- Permanent URL: Get a consistent, non-expiring URL for your site
- Custom Domain: Add your own domain name
- Site Controls: Access deployment settings and analytics
- Team Access: Share site management with collaborators
What will happen if I don't claim my deployed project?
What will happen if I don't claim my deployed project?
If you don’t claim your deployed project:
- Temporary Access: Your project will remain accessible through the Same-generated URL
- Limited Time: The deployment will expire after 14 days of inactivity
- Data Preservation: Your project code and history remain safe in Same
- Redeployment: You can always redeploy the project to reactivate the URL